29 October 2010

What I wore last night

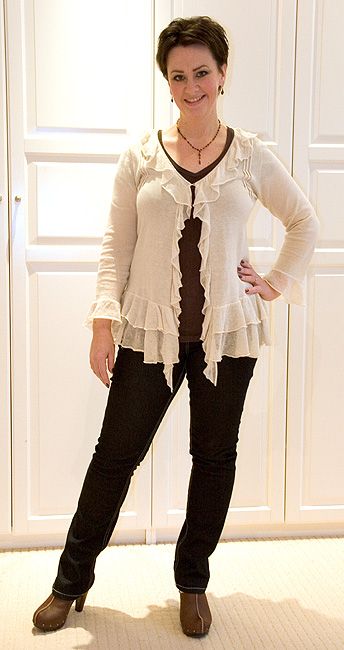
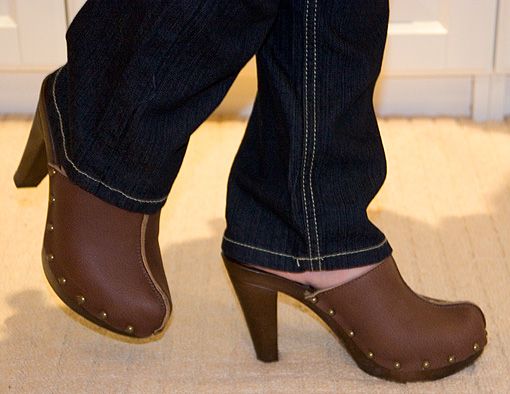
Last night I went out with the girls to a curry restaurant - I had a great time and best of all I got to wear my new shoes! These were from Tesco, £28 marked down to ... wait for it ... £4.50. Bargain! And so comfy too (they are leather with sheepskin lining). I got them in black suede too.

Photobucket

Photobucket

Cream waterfall cardigan: passed on from a friend (thanks, Rachel!)
Brown t-shirt: Matalan or Sainsbury's
Dark-wash skinny jeans: Matalan
Clogs: Tesco (on sale)
Necklace: Accessorize outlet (on sale)
Earrings: BHS


Pin It

26 October 2010

Danielism

Conversation we had today (I love being the mom of boys!):

Daniel: I want to be the kind of person who can burp on purpose.

Me: It's good to have goals, son.

Daniel: I went on Wiki Answers to find out how.

Me (laughing): You are such a boy!


Pin It

Karen's craft room during (part 2)

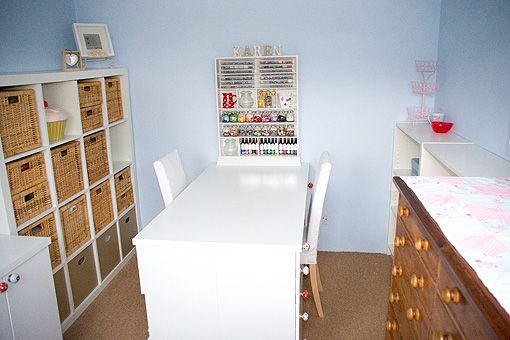
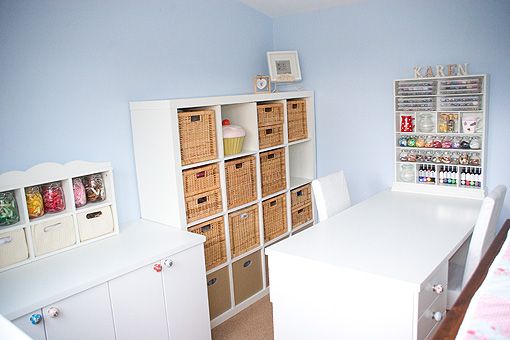
On Saturday the boys and I drove back up to Karen's house as her worktops and knobs had arrived and she needed my help installing them. My boys played with her son beautifully all day while we worked and by the evening the room was pretty well put together.

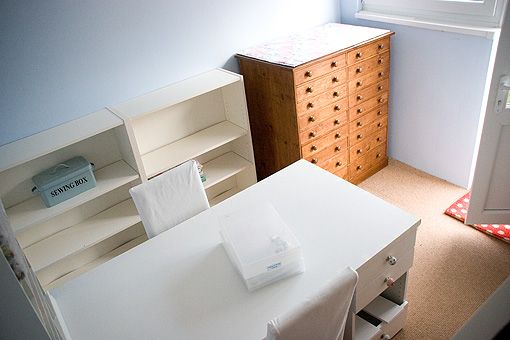
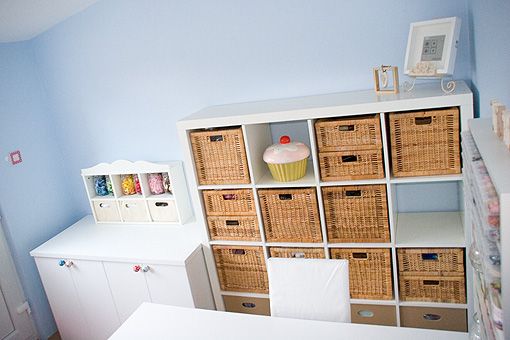
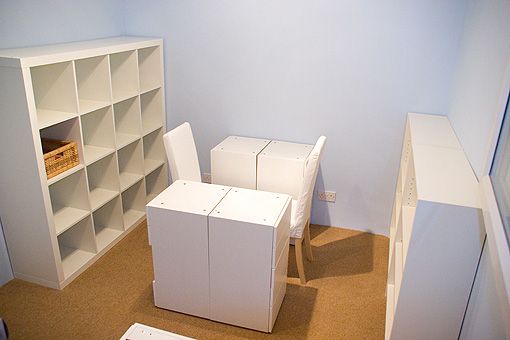
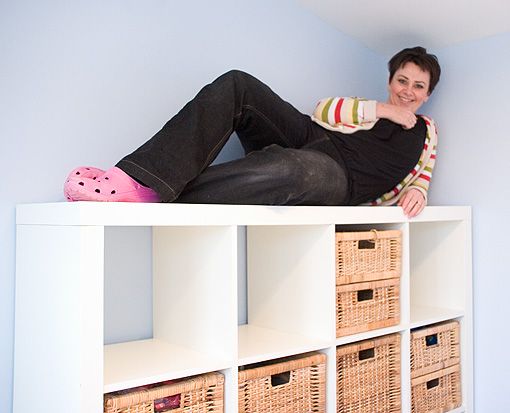
The Expedit needed some pressure at the top to press the top piece down onto the shelf supports so I climbed up on top to do so - naturally Karen had to take a picture!

Photobucket

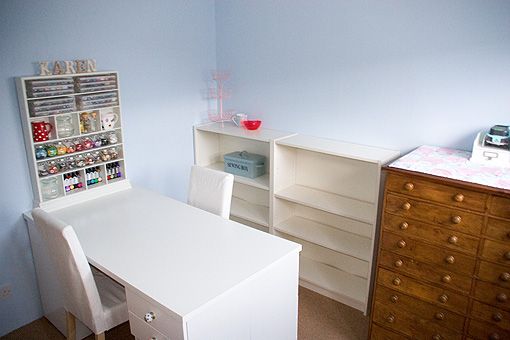
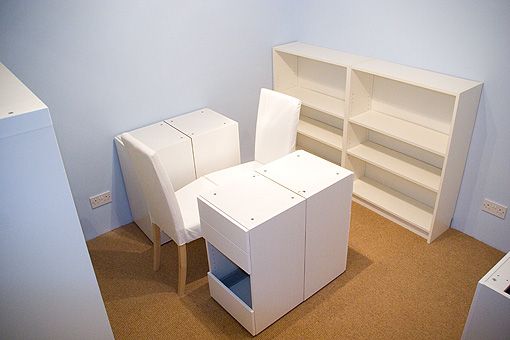
The view from the top of the Expedit - you'll notice the layout has changed a bit, with the plan chest moved across to the left hand wall and the units that were under the window now next to the Expedit.

Photobucket

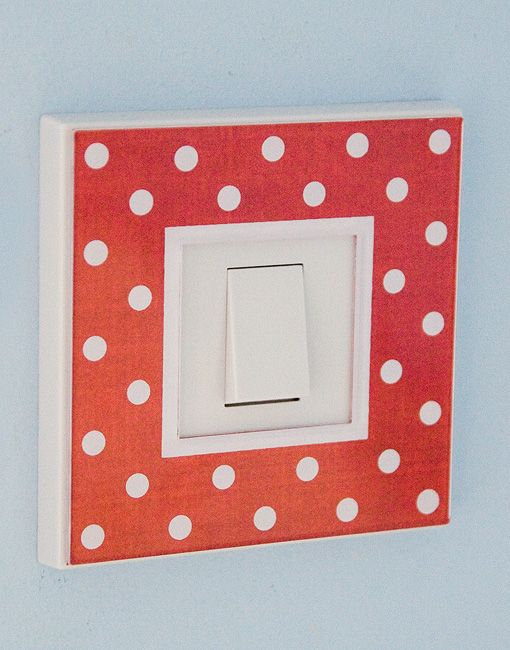
When we were putting all of Karen's scrapbooking bits into the units I spotted this little acrylic Making Memories frame. I knew Karen had to use it somewhere in her room as polka dots are part of her theme (red, blue, white, pink, polka dots and cupcakes). She put some red paper behind it and what do you know, it fit perfectly on the light switch!

Photobucket

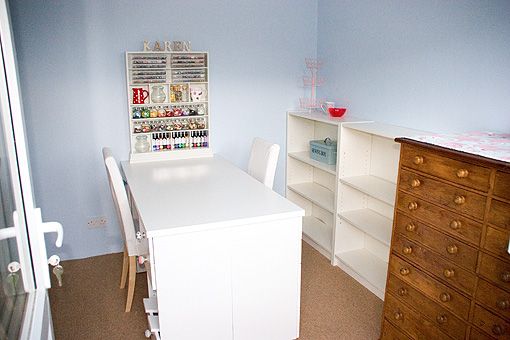
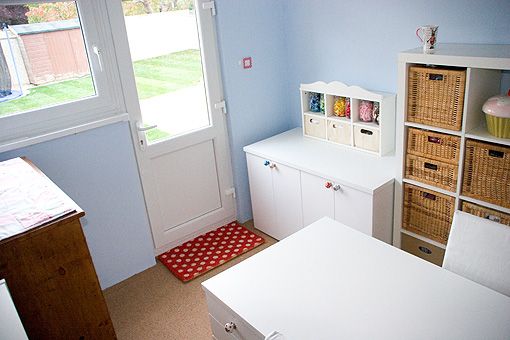
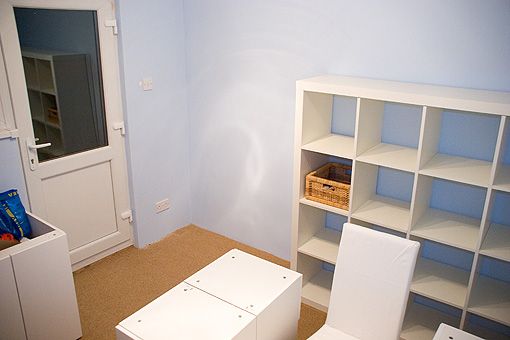
View from the door - the Billy bookcases will have doors covering the bottom two shelves.

Photobucket

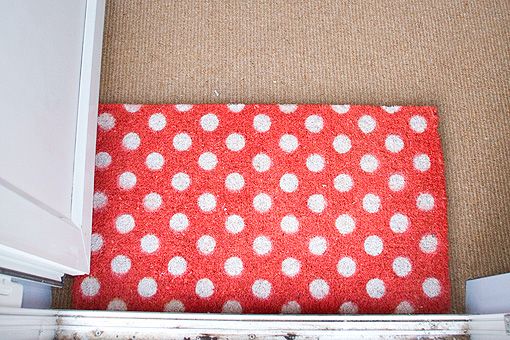
Adorable doormat!

Photobucket

The little unit on the two floor units will be wall hung:

Photobucket

Photobucket

Photobucket

Photobucket

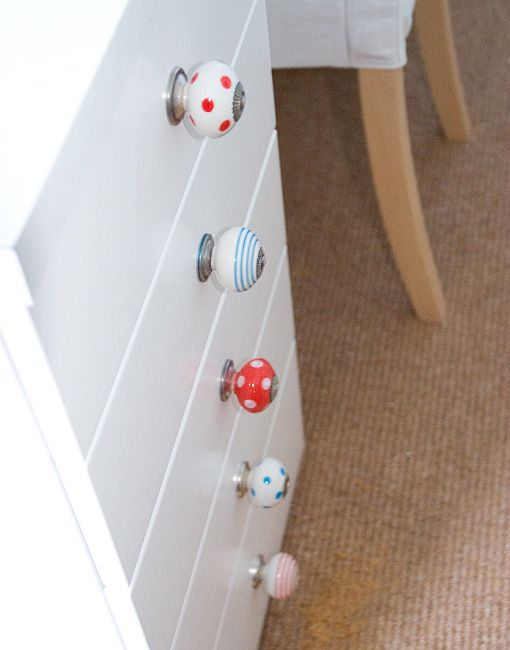
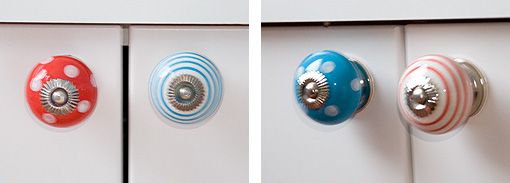
Adorable ceramic knobs from Dotcomgiftshop.

Photobucket

Photobucket

Photobucket

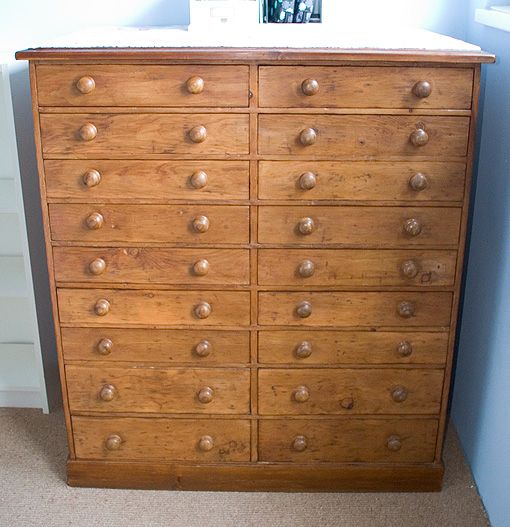
Karen's beautiful antique plan chest:

Photobucket

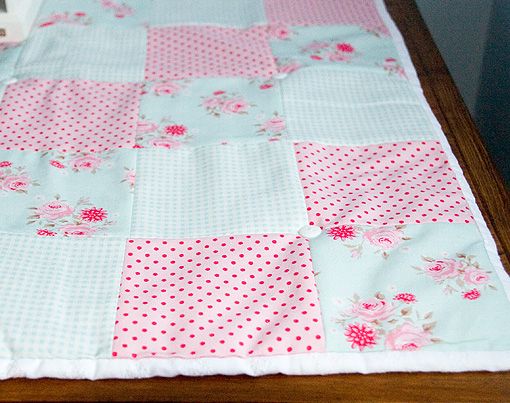
The quilted runner she made to protect the top:

Photobucket

More photos to come when the room is completely finished and filled with decorative touches - I'll take pictures when I go up to scrapbook with Karen!


Pin It

25 October 2010

Listen

If you have a friend who needs to talk, please just listen. Don't offer advice or try to fix her problems, just be there. You may never know the value of this loving act of service. You may never realise the difference you make. But I promise you, you will make a difference.

I am so grateful to have friends and family members I can talk to. To those who listen to me so patiently, thank you. Thank you for being an instrument in His hands. Thank you for being an answer to a prayer. Thank you for not judging me, for being patient with me, for hearing me. Thank you for listening. You may never understand how much you help me, but you make all the difference. Thank you.


Pin It

19 October 2010

Karen's craft room before and during

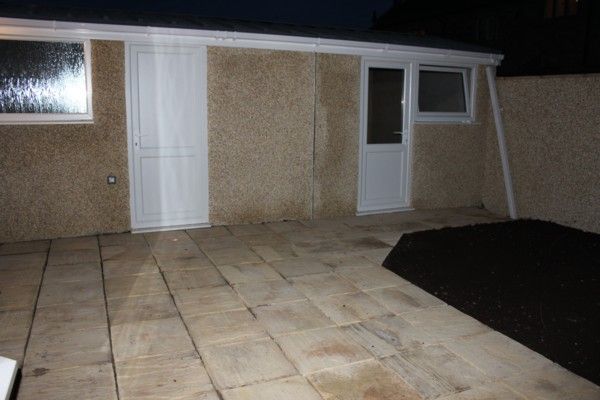
Yesterday I was feeling a lot better and it's just as well - I had plans to help my friend Karen put together her new craft room (thank you Laura for rescheduling our visit!) She has had a little room (about 10x10ft) built at the end of her garage to be a little den for her to escape to and do her scrapbooking, quilting and other crafts (she is very talented!)

Here you can see a shot that I nicked off her blog - click on over there if you want to see progress pictures as it was being built. She took this picture the other night before it was all finished - the downspout has been installed properly and the seam covered up.

Photobucket

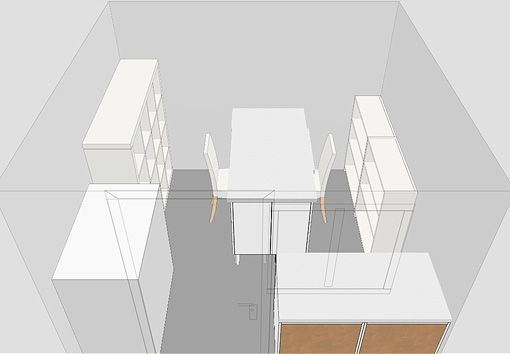
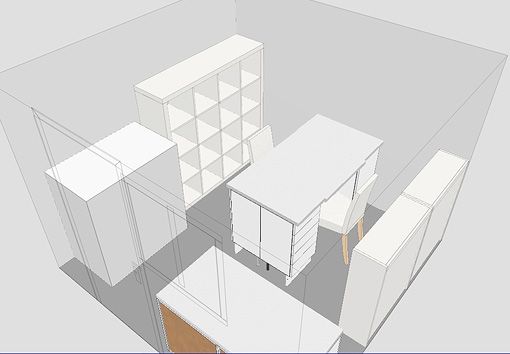
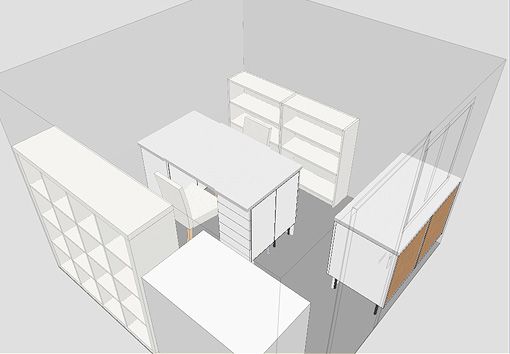
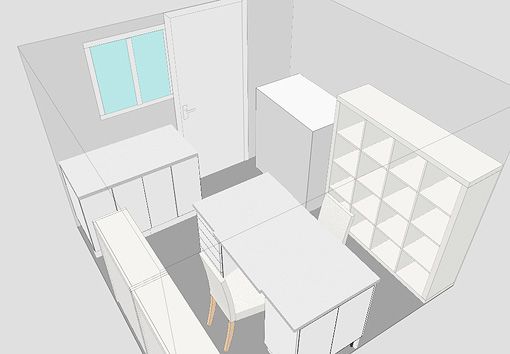
While it was being built I worked with Karen in designing the perfect space for her, incorporating seating and desk area for two people, plenty of storage, her existing 4x4 Expedit bookcase and a beautiful antique plan chest. Here is the design we decided on (the big grey box next to the Expedit represents the plan chest):

Photobucket

Photobucket

Photobucket

Photobucket

So, as I was saying, yesterday I left home at 9:40am and drove an hour to Karen's house (I only got home at 8:40pm). We spent the day:
- putting together the six flat-pack Ikea kitchen units, including all of the drawers except for two that were out of stock (aargh!)
- unpacking, dismantling, moving to the craft room and putting together again the Expedit bookcase that used to be in the guest room
- putting together two Billy bookcases and fastening them together
- putting together two Harry chairs
- driving to two different DIY stores to get wood strips and screws to act as little risers beneath the kitchen units and fasten them together

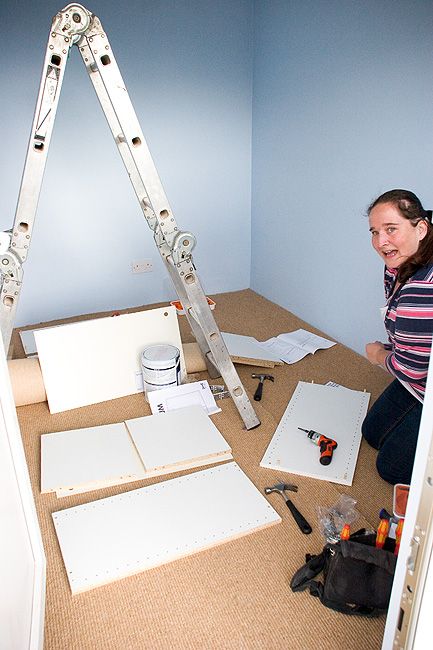
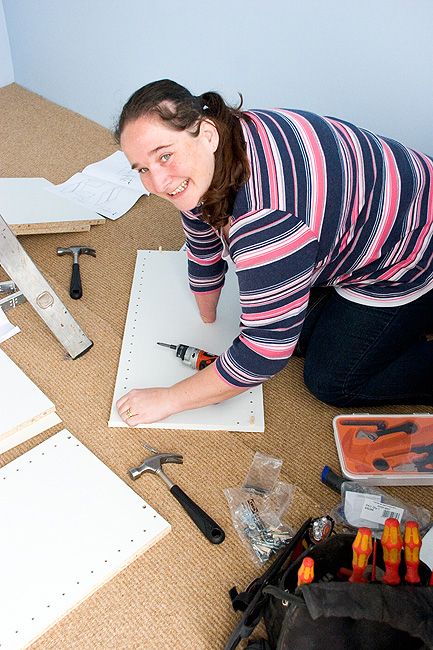
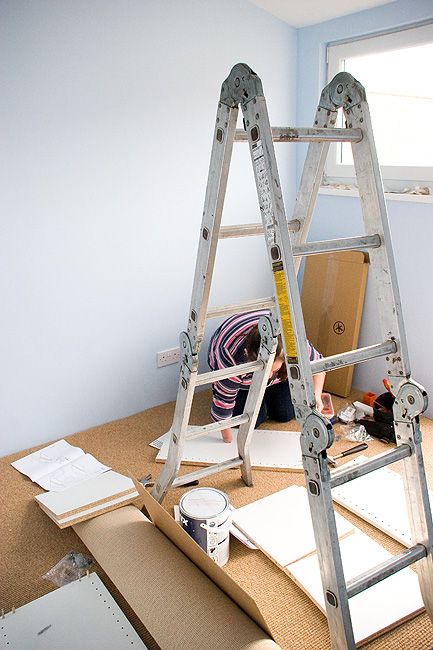
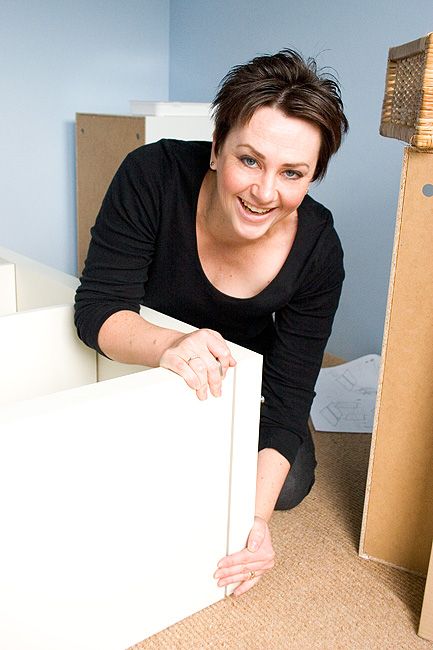
Here are some action shots of us putting together the units. Did I mention that the electrician was finishing up as well (hence the ladder)?

Photobucket

Photobucket

Look at the amazing light she gets in this room, thanks to a big tilt-and-open window and half glazed door - you wouldn't even know that it was an overcast, rainy day!

Photobucket

Photobucket

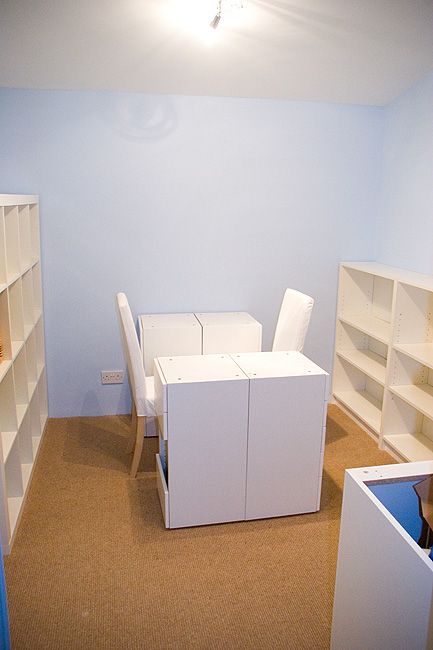
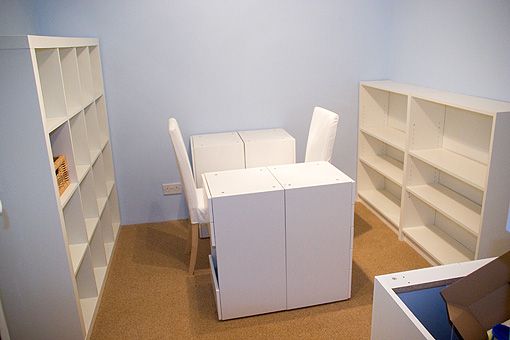
The half-finished result. Obviously the worktops are still to come! I love seeing my designs come to life.

Photobucket

Photobucket

Photobucket

The plan chest needs to be moved into the corner next to the door:

Photobucket

Photobucket

I had a blast and my extensive flat-pack experience came in handy. (I have now put together a total of 143 flat-packs! That doesn't count the ones I put together more than once; after dismantling for a move, for instance. And as an expert, I can tell you that Ikea's are the best.)

Stay tuned for the final reveal of Karen's craft room - I'll be visiting her in a couple of weeks' time to take pictures of the completed room with all of her bits and pieces in. I can't wait to see it all - and to scrapbook there with her!


Pin It

18 October 2010

I'm still here

Sorry I haven't posted properly in a while. Things have been pretty busy here - these are some of the things I've been doing:

- we had a viewing on the house we're in but they decided not to buy
- I helped two people with organising
- had THE WORST haircut of my life (no exaggeration) - and it took an hour and a half! I felt traumatised
- had a birthday (my 35th, yikes)
- currently suffering with two ear infections - so painful! Sorry to those whose phone calls I haven't returned, I can't bear to even hold the phone against my ear

So! I'm still here, but nothing very exciting to blog about. No news from NZ although we wait with baited breath.


Pin It

15 October 2010

Feed the children for free

Before the summer holidays the kids and I used to play a game called "What we're looking forward to". We'd take turns to list all of the things that we were anticipating doing in the summer, including our favourite forms of free entertainment like blowing bubbles outside, having picnics and visiting the beach.

We didn't actually get down to the beach much this summer but one of the nicest days out that we had was at Beacon Fell. I'm already missing the warm weather as autumn settles over us!

But enjoying free things to do doesn't just have to be about being outdoors. Did you know that Pizza Hut was running a promotion over the summer allowing kids under the age of 12 to eat free at their restaurants? Well, I didn't know about it at the time but I do now ... and it's not too late to take advantage of this offer because they've extended it until January!

For every adult main course or adult lunchtime buffet purchased, an accompanying child can choose from either a FREE 2 course kids meal (which includes a drink) or a FREE kids lunchtime buffet (which includes pizza, pasta and salad). And we have until 9 January next year to get down there and enjoy the offer.


As if the Kids Eat Free promotion is not enough, take a look on the bottom of any Pizza Hut Restaurant receipt and you will find an offer code. Enter this code at http://www.pizzahut.co.uk/familyadventures to get great deals on a wide range of family activities and adventures including holidays, theme parks, zoos and more. Perfect for keeping the kids entertained during the half term holiday that is coming up!


Pizza Hut
Kids Eat Free

Sponsored Post


Pin It

12 October 2010

Autumn nails

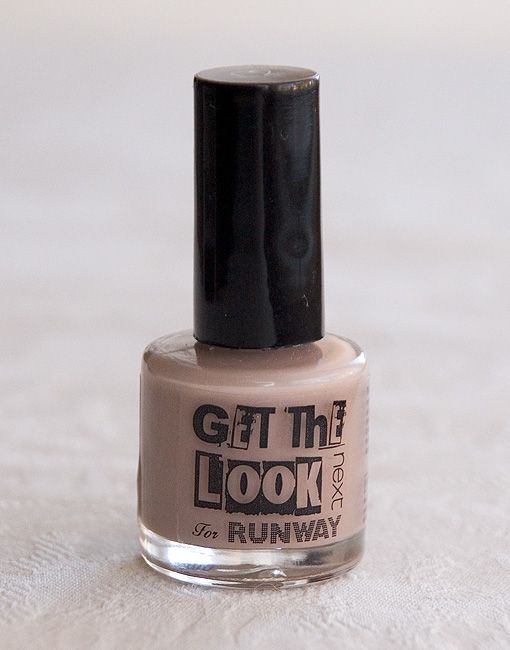
This greige / mushroom / putty colour is bang on trend for this season. I got it at Next for £2 and it's called "Mink". The coverage is amazing, I could almost get away with only one coat. It looks pretty brown here but in most lights it's more grey. I really like it and I like that it goes with everything.

What nail colours are you loving right now?

Photobucket

Photobucket


Pin It

Chocolate brownies

As requested, here's the recipe for the brownies that I posted pictures of yesterday.

Chocolate Brownies

Preheat oven to 180°C / 350°F / Gas 4. Lightly grease baking dish (mine is 10x10 inches). Mix together the following ingredients:

280 g caster sugar
pinch of ground cinnamon
½ teaspoon salt
½ teaspoon baking powder
225 g plain flour
40 g unsweetened cocoa powder
300 g chocolate chips (this weekend I used chocolate cut into chunks)
60 g walnut halves, coarsely chopped (optional)
125 ml sunflower oil
3 eggs
50 ml water
1 teaspoon vanilla extract

Spoon mixture into baking dish; spread evenly. Bake about 20-30 minutes or until firm to the touch and cake tester inserted in centre comes out clean. Cool for a while in dish before cutting and serving or they will just fall apart.

(Note: I watch it very carefully in the oven and take it out when the edges are done but the middle still leaves a couple of wet crumbs on a toothpick - I like my brownies chewy and gooey. The good thing about this recipe is even if it's quite gooey in the middle it doesn't taste uncooked.)


Pin It

Rich and gooey brownies

Chocolate brownies 1

Chocolate brownies 3

Chocolate brownies 2

"By the way, why is it that when a person first loses weight, they dismiss it by saying, "Oh, it's just water weight." Like that's a bad thing that the weight is made of water. I don't care if it's made of brain tissue, I just want it off my body."


Pin It

7 October 2010

Dressing table

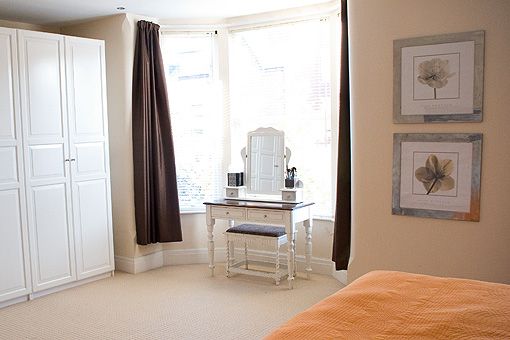
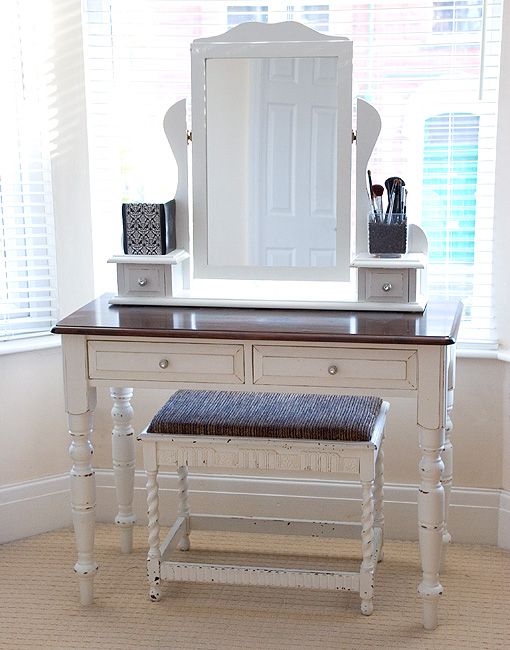
I've been wanting a dressing table to do my makeup at so I shopped the house for furniture. This is the beauty of having white furniture throughout the house - pieces can fit into any room.

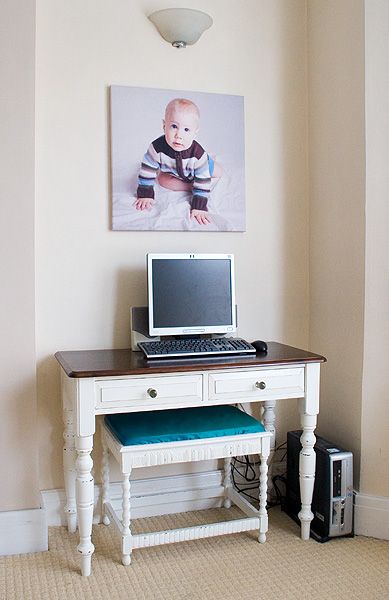
Remember this pine desk ...

Photobucket

... that I painted?

Photobucket

It first lived in the studio as a computer desk ...

Photobucket

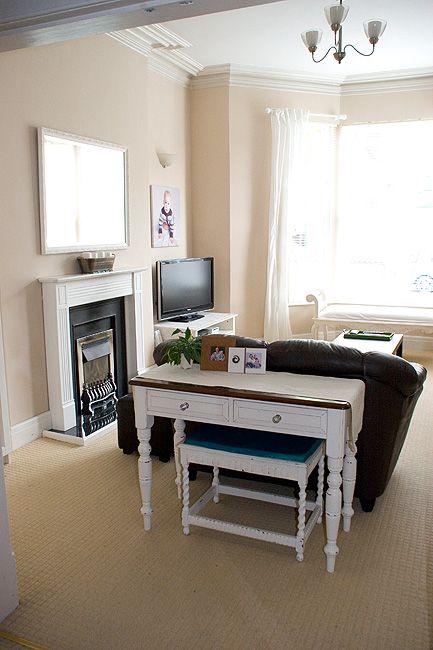
... then lived behind the sofa once I switched rooms around.

Photobucket

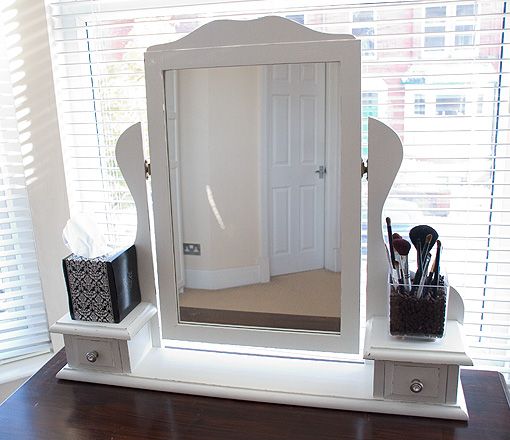
Well I decided that it would make a perfect dressing table, especially since that's what I think it originally was, paired with this mirror:

Photobucket

I painted the mirror antique white to match the desk - but it somehow still doesn't match exactly and I don't know why since I used the same paint. Oh well!

Photobucket

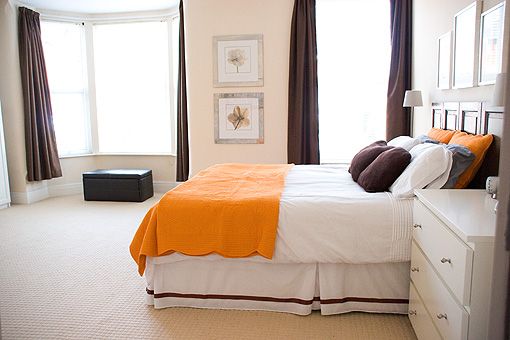
So, where did I put it? Well, I thought the perfect place to put on makeup would be in front of a window for natural light. The bay window in our bedroom was the perfect spot:

Photobucket

I moved the faux leather trunk to behind the sofa and added the dressing table (yes, I know the curtains are too short but I'm not altering them now because we're moving and I doubt I'll have 11 foot ceilings in our rental in New Zealand):

Photobucket

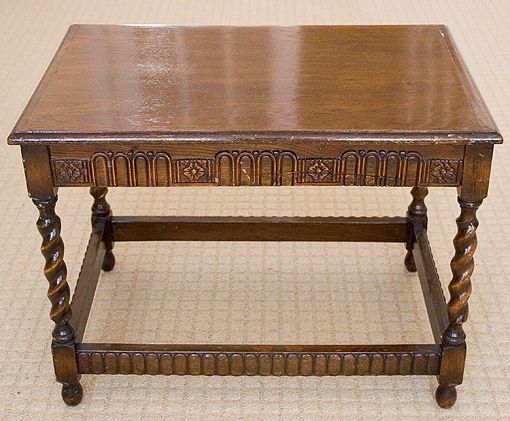
Remember this little table ...

Photobucket

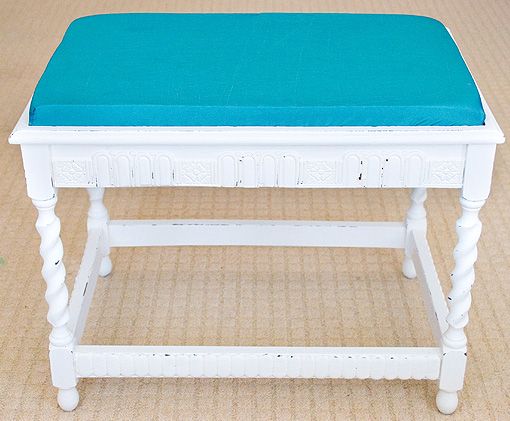
... that I painted, distressed and added a turquoise cushion to?

Photobucket

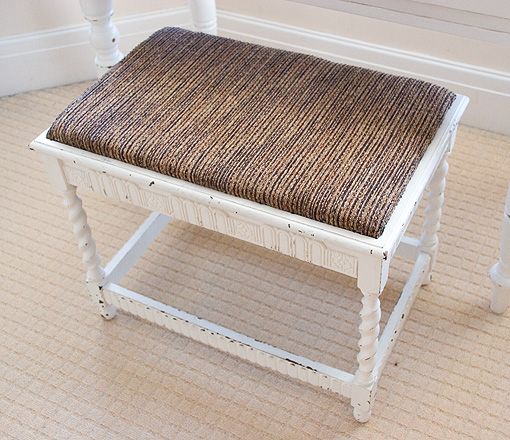
I'm glad I distressed it because it's had some knocks since then but the chips just look like they're meant to be. Anyway, I re-covered the cushion with some fabric I had:

Photobucket

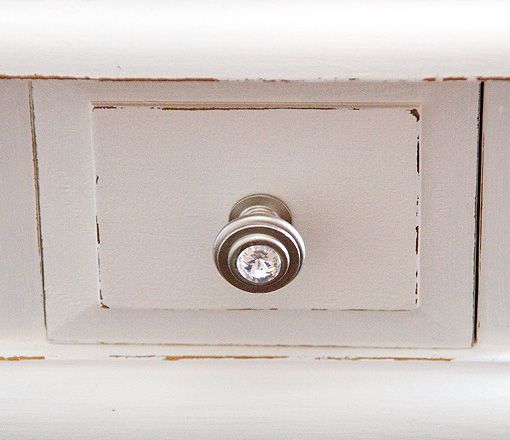
I also replaced the knobs on the table so that they would match the knobs on the mirror drawers - I bought these off eBay because I couldn't get any more to match the ones that were on the table and also because one of those broke and I didn't want to buy more in case they broke too. I love these - the crystals catch the light and twinkle as you walk past.

Photobucket

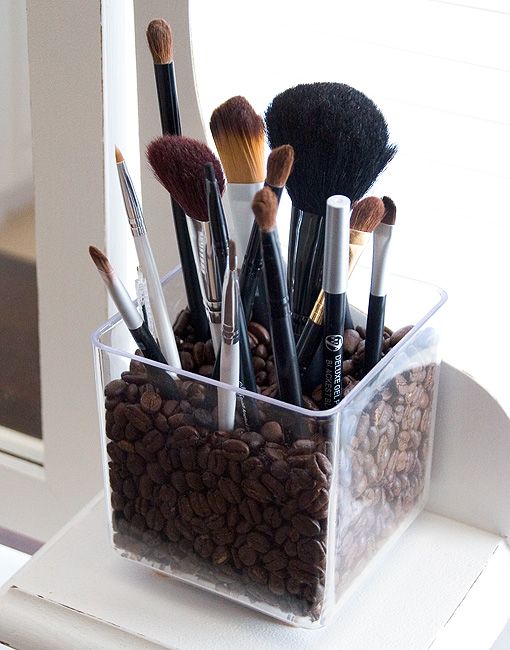
I bought this little container at Tesco and filled it with coffee beans for my makeup brushes. I don't drink coffee but I like the smell and it's just as well because for about a week after I first got them it felt like I was sleeping at Starbucks. The smell has faded now.

Photobucket

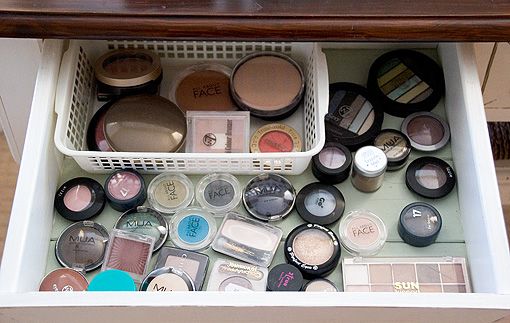
The left drawer holds my eyeshadows and a little basket with my blushes, powder and cream-to-powder foundation:

Photobucket

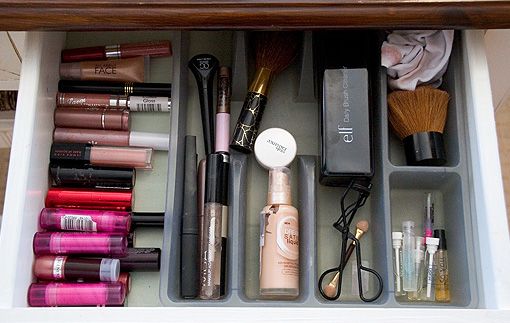
The right drawer holds my lipsticks and lip glosses and a drawer organiser which holds my brush cleaner, mini perfumes, eyelash curler, mascaras, liquid and felt tip eyeliners, kabuki brush, a rag for cleaning my brushes, my foundation and eye primer:

Photobucket

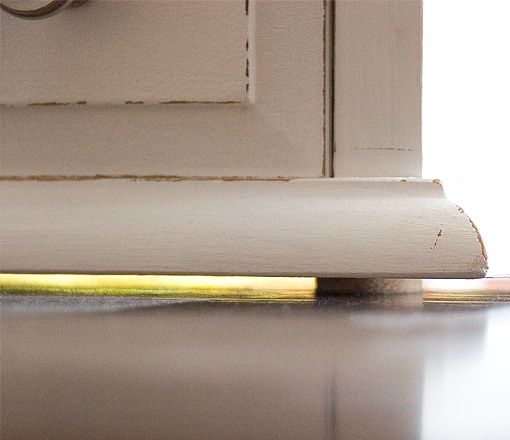
I put these little felt pads underneath the mirror so that I can slide it forward when I do my makeup - I need to be up close to a mirror, especially when doing eyeliner:

Photobucket

I love having this little spot to get ready! And all it cost me was the price of the knobs (I think £6) and the little container and coffee beans (oh, and the box of tissues on the left).

Photobucket


Pin It
Related Posts Plugin for WordPress, Blogger...